
When looking for Christmas presents this past year, I wanted to find a "group" gift for my niece and nephews that they would all love, wouldn't take up too much space, and something they didn't already have. I found the PERFECT gift! It was so perfect, I actually bought one for my own kids too :) Something I wouldn't want to live without: the Zoku popsicle maker from Williams Sonoma. I love it so much, I thought I would create a post about it!
So, in the package you get the unit itself, six popsicle sticks, six drip trays, and a small orange knob-looking thing that loosens the popsicles once they freeze to remove them from the unit.
The best thing about this product is that you can instantly make really healthy popsicles cheaply that the kids think are super special treats (i.e. when they beg for ice-cream, I say "Let's make popsicles instead" and they always think it's a great idea!). You keep the unit in the freezer for at least 24 hours, and when you are ready to make the popsicles you take it out, fill it up and wait usually about 9-10 minutes and Presto! You have three delicious popsicles! You can make up to 3 batches in a row, so 9 total, without having to refreeze the unit. When you are done making the popsicles you don't even have to wash it - just put some freezer wrap over the top and stick it back in the freezer for next time!
Here's the process outlined:
 My lovely Carmela modeling some of our favorite juices to use! My favorite place to go is in the produce section at the grocery store near the fruits. They usually have a whole rack of natural drinks and when they are on sale they aren't too expensive at all. Plus you can get a ton of popsicles out of one bottle of juice - each one only takes maybe a quarter cup of juice.
Any "Naked" drink will work, or smoothie drink - and here we also used some Mott's Medleys fruit/vegetable mix apple juice. You can use any liquid as long as it has some sugar (natural or added) in it which prevents it from sticking to the unit, and as long as it isn't carbonated (you can let carbonated drinks such as root beer go totally flat and then use them if you want).
 Here is the unit shown in our freezer. It takes barely any space at all, as you can see I have it shoved next to some frozen broccoli :) It's good to keep some freezer wrap on top just to avoid getting ice crystals on the inside too.
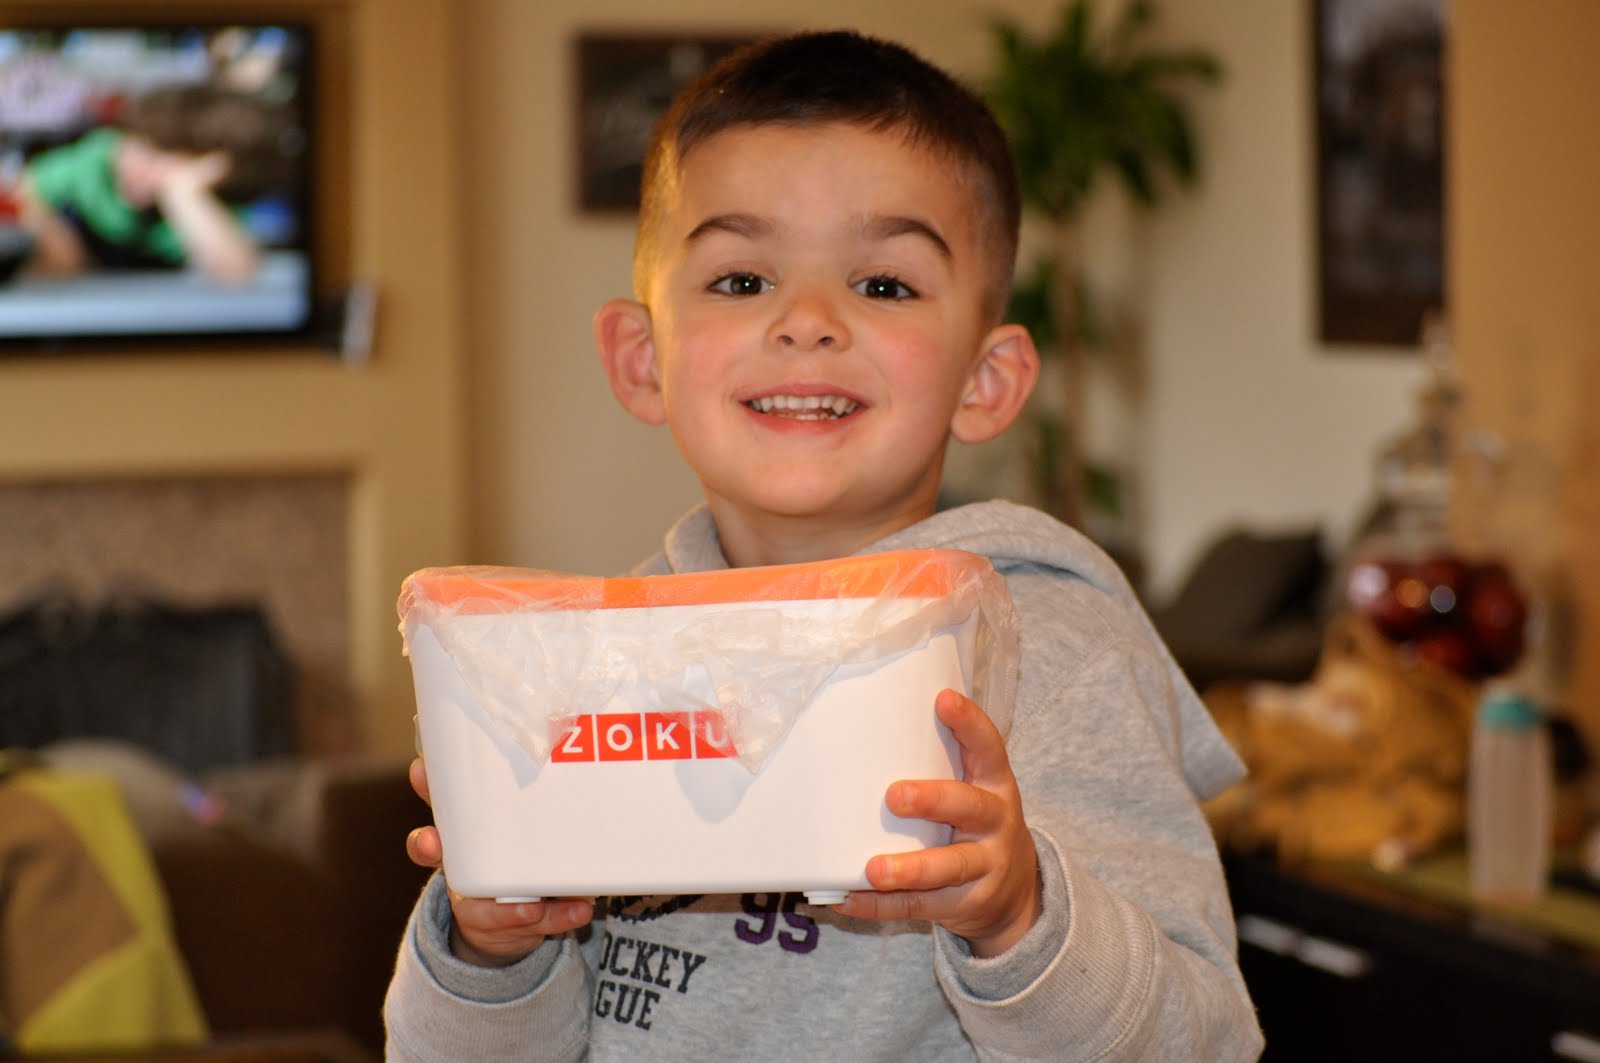 And sir Leo holding it to give some child-size perspective on size. Just don't let them touch (or lick) the top of it right after you take it out of the freezer. Think a Christmas Story with the flagpole - not funny when it's your kid and it's his tongue frozen to the top. Now, being the super safety-conscious mom that I am, this has never EVER happened to MY kids, so of course I actually wouldn't really know. I am just assuming it wouldn't be a good thing for you moms who don't watch what your kids are doing- lol :)
 Here are a few of the sticks, drip trays, and remover tool.
 So you just pop the sticks in, carefully pour in the juice, and wait about 10 minutes. The really fun part of this 10 minutes is the game you can play that we like to call "If you touch that one more time before it's ready, you don't get a popsicle!!!!!". My kids like to stick their fingers in just to "check" if it's ready. This is frustrating. If you must, place the unit on top of the refrigerator until it is ready. Or outside. Or lock it in the bathroom. Again, I have never had to do this with my children because they ALWAYS listen to me, but I just wanted to throw some tips out there for the rest of you.
 Screw the knob-thingy on the popsicle stick, turn it a couple times, turn it back and take it off. You can see the popsicle separate from the inside when you do this. Then just snap on the drip trays and pull out the popsicle, and enjoy the next several minutes of quiet as your kids lick away their frozen creations. (as a side-note, please disregard Carmela's Dora underwear and lack of pants in this picture... I'm saving my "Adventures in Potty-Training" for another post another time!)
 Here is another one I made just to show some variation. Part of the fun of it is you can make all kinds of different popsicles. This one I layered with all three juices. You can also add really thin slices of fruits (although this is slightly difficult to fit them in the compartment that the stick goes in). But we have successfully made ones with banana, strawberry, and kiwi slices. Plus they look all professional when they come out!
Liquids we have used for popsicles:
Apple Juice
Orange Juice
Pudding (just use it when it is soupy before it thickens up)
Carrot Juice
Kool-Aid
White Grape Juice
Strawberry-Banana smoothie drinks
Green-Machine (a combo of green fruits and veggies)
and my absolute favorite: Starbucks bottled Mocha Frappuccino - mmmmm
I suppose you could do spiked ones too using juice jacked up with vodka, but I suggest waiting till the kiddies are sleeping for that treat :)
Drinks that have NOT worked:
Plain black coffee (it didn't work because there was no sugar in it)
Root Beer (we didn't let it flatten out enough - any carbonation won't work)
NOTE:
When the popsicle doesn't work, you have to let the whole thing completely defrost and dry out, then you can stick it back in the freezer.
Cost:
$49.95 plus tax, available at the Williams Sonoma website (plus they have lots of fun accessories to go with it if you want - although I haven't tried any of them yet).
However, keep in mind that the unit basically lasts forever and you will never have to buy popsicles again!! So worth it in my mind - would make a fantastic Easter basket gift too!
I know I'm not much of a salesperson, but I jut wanted to spread the word on something I think is great!
That looks like so much fun!
ReplyDeleteI'm a new follower from the hopscout FB page! ;-)